

WHAT IS “BACKING UP”?
Backing up, plain and simple, is saving a duplicate version of all your work. This includes your website theme and related site files (like plugins) as well as your database (which includes posts, users, comments, etc.).
Backing up is similar to how you might save an important document to your Google Drive or Dropbox and to your desktop. It’s always wise to save important items more than once and in more than one place, or “medium” (like an external hard drive, thumb drive, the “cloud”, on your computer, and so forth.)
Method 1: Backup WordPress Through Your Hosting

Your first option is to simply choose a hosting company that completes full, daily backups of your WordPress site. For example, WP Engine Managed WordPress hosting offers automatic daily backups up all of you core WordPress files, themes and plugins, and your database (including all of your media). Plus you can initiate your own backups at any point (like before a major WordPress update, or when changing themes).
If you want to take your hosting provider managed backups to the next level, log in from time to time and download your own zip file copy to keep on your own hard drive. You never can be too safe.
Method 2: Backup WordPress Manually
Your WordPress directory contains sub-folders e.g. wp-content, wp-includes etc and files e.g. wp-config.php, theme and plugin files etc required by your WordPress site. The wp-content folder contains all your themes, plugins, cache and uploads among other things. You cannot afford to lose this data. The wp-admin carries all the files required by your WordPress admin area, so you can’t afford to lose this as well. The wp-includes folder contains WordPress core files. This is the folder where all the major WordPress code lives. You definitely don’t want to lose this code.
Step 1: Backup Your WordPress Files Manually
To create a copy of your WordPress files, you just need to download your entire WordPress directory. How? You can login to your server via cPanel or using a SFTP program.
Backup via cPanel
This is so easy you can do it in the time it takes to brew a mug of coffee. Here’s the procedure:
- Login to your web host and navigate to cPanel. For most web hosts, the cPanel is usually the first page you encounter when you login
- Navigate to the File Manager, which should lead you to your public_html or Home directory
- From here, just locate your WordPress directory. This is the folder you want to backup
- Unfortunately, you can’t download the WordPress folder in File Manager without first compressing it. Worry not though, compressing a folder needn’t be challenging
- Click on your WordPress directory, and select Compress from the menu bar. Alternatively, right-click on the folder and choose Compress from the drop-down options menu that appears
- Choose the compression type e.g. ZIP, Tar, GZIP etc from the dialog box that opens. I always go with a ZIP archive
- Then just hit the Compress File(s) button and wait for the process to run its course. Your server will save your compressed WordPress folder
- Click on the archive you just created and choose Download from the menu. Alternatively, right-click on the archive and choose Download.
- Choose a secure location on your hard disk and save your backup
- And that’s it!
Tip: Upload the backup to your Dropbox account, Google Drive, burn it to a DVD/CD, email it etc – just make sure you have several copies to ensure you don’t lose your site should one of the backup dies.
If your web host uses a different control panel e.g. vDeck, Plesk, etc, you just need to locate your File Manager, and just follow the process i.e. Locate File Manager > Locate your WordPress directory > Compress > Download. Repeat regularly.
Backup via SFTP
We recommend using a popular file manager such as FileZilla or Transmit because they’re lightweight and easy to use. First, you’ll need to install the application on your computer and retrieve your SFTP login credentials from your hosting account.
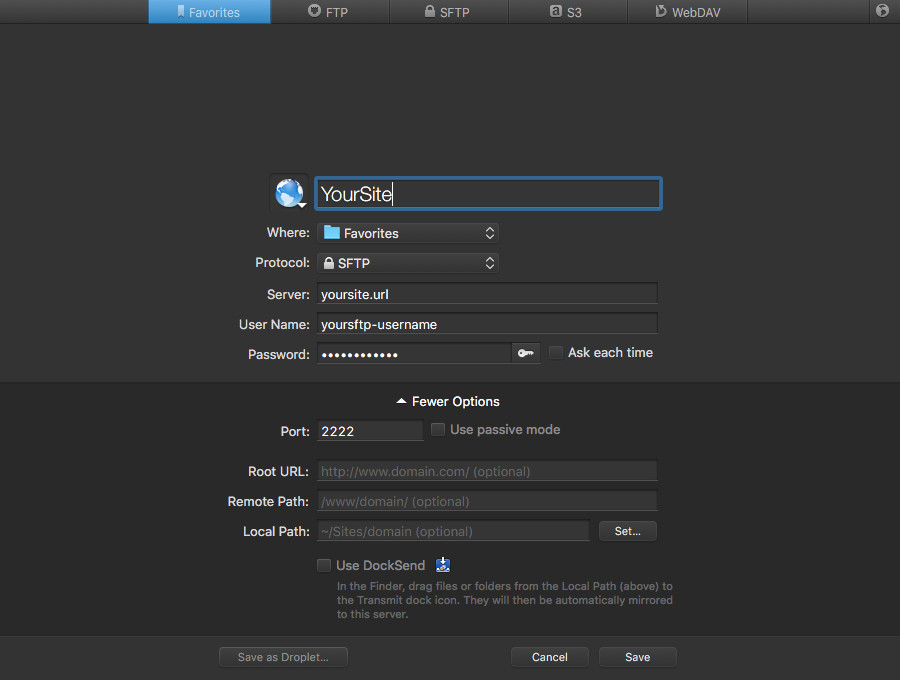
Next, log into the file manager of your choice (we’re using Transmit in this example) and enter the details for your website including a nickname, your website URL, your unique SFTP username, and password, and change the port number to 2222.
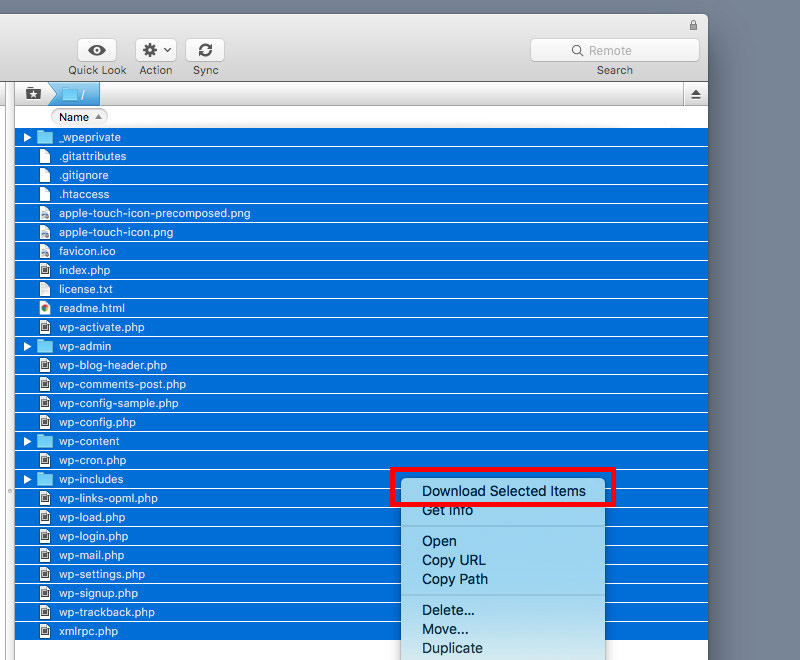
Once you’ve logged in you should see all of your WordPress files. Simply select all of your files, right click and select the option to “Download Selected Items.” Once downloaded, make sure the files are zipped up and give the file a memorable name such as today’s date.
Step 2: Backup Your WordPress Database Manually
Now that we have a fresh copy of your WordPress files, let’s backup your WordPress database, so we can have a full backup that will come in handy on that proverbial rainy day. This is also so easy you will be backing up your site whenever without breaking a sweat.
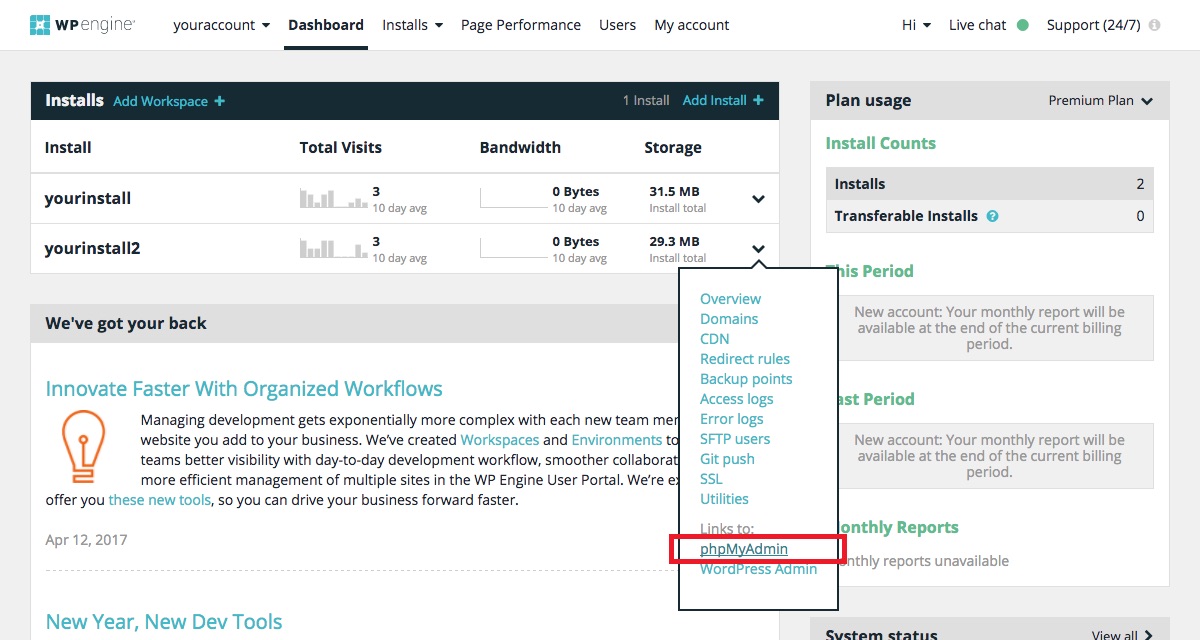
Just navigate to your hosting panel and locate phpMyAdmin. It’s for cPanel users it will be located under Database Tools:

However, depending on your hosting it may be located elsewhere. For example, WP Engine users can locate their phpMyAdmin from the main user dashboard by clicking on the chevron icon next to your installation(s):
Once you log into phpMyAdmin you should see a main administration panel:
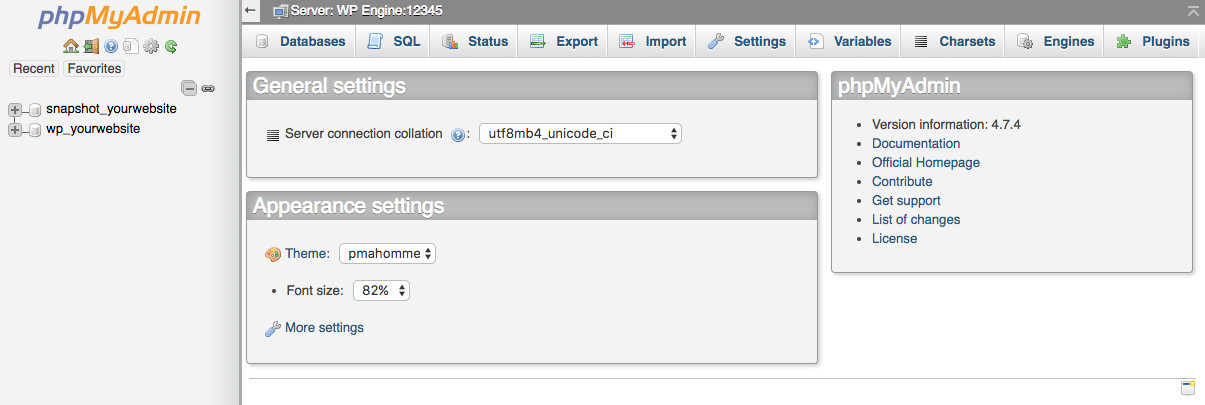
Select the Databases tab to list your databases. If you installed your WordPress site using third-party platforms such as Softaculous or Mojo Marketplace, you might have no idea which database to work with. What to do?
From your File Manager, navigate to your WordPress directory and locate the wp-config.php file. Right-click on the file and choose view. In the window that opens, you want to locate this line:
define('DB_NAME', 'database_name');
Your database name is the value contained in the second set of single quotation marks, which is ‘database_name’ in our example above. Armed with this info, locate your database in phpMyAdmin. Click on the database to open it. You should see something such as:
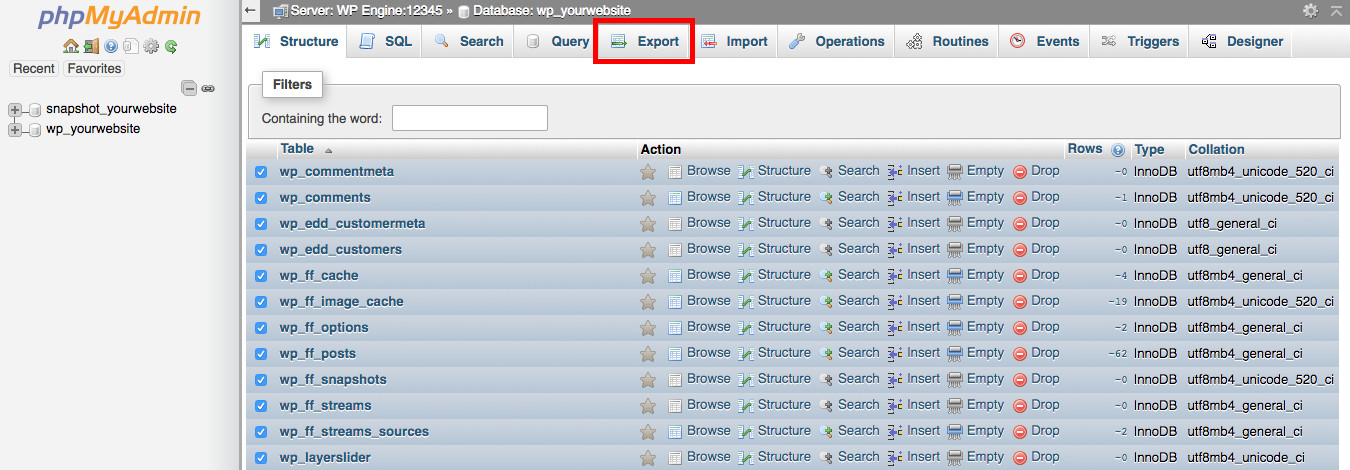
Select all the tables you’d like to backup by ticking the checkboxes. Click “Check All” at the bottom to select all at once. Once you’ve selected the tables, click the Export tab. Select the export method, and set format to SQL:
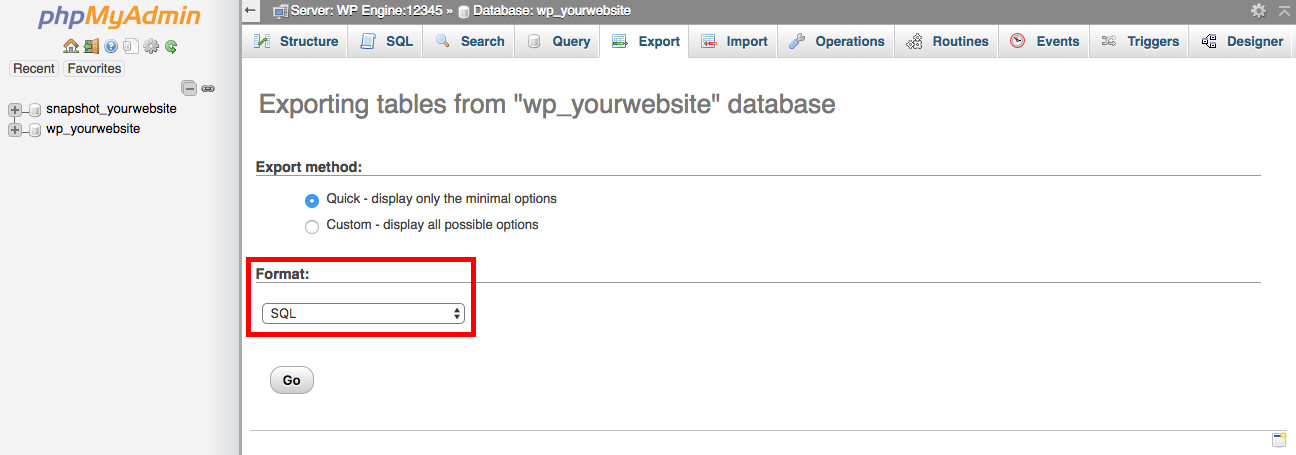
Hit the Go button, and save your database in a secure folder on your PC. Remember to save copies in the same locations you saved copies of your WordPress files. That’s it, you now have a full backup of your WordPress site!
Using a different setup? If your host doesn’t provide cPanel, please check out this WordPress backup post at the Codex.
Tip: Create regular backups depending on the frequency of posting to your WordPress site. If you post 50+ posts per day, you need to create backups more regularly than the guy who posts once a month. Other than that, consider checking if your web host offers a reliable backup solution.
Moving on, let’s automate WordPress backups using a couple of nifty WordPress backup plugins. I’m all for manual backups because that way you’re in complete control. All the same, here’s a great list of the best WordPress plugins out there.
Method 3: Backup WordPress Automatically with Plugins
WordPress backup plugins add the element of ease to creating dependable backups for your WordPress site. All you have to do is install your favorite WordPress backup plugin, configure a few settings and you’re good.
VaultPress Premium Backups by Automattic

VaultPress was created by Automattic to make backing up and securing your website easy. VaultPress take automatic daily backups of your website that are stored securely offsite. And using them to restore your website is as easy as logging into your account and clicking a button.
Duplicator Free WordPress Plugin

With over 1 million active installs, Duplicator is more than your typical backup plugin. Primarily, Duplicator helps you to clone or migrate your site to another location easily. This main feature makes it a powerful backup solution.
Even though it won’t allow you to schedule backups, it automatically dumps your database to an SQL file and saves it to a ZIP archive along with your WordPress files. Then it creates a special PHP file that lets you reinstall the backup easily. Just upload the ZIP archive and the PHP file to your server, and the rest is easy work.
BackWPup Free WordPress Plugin

BackWPup is a popular WordPress backup plugin that helps you to create complete backups of your WordPress site, and save the same on an external location such as Dropbox, Amazon S3, FTP, RackSpace Cloud and many more.
You can schedule full backups meaning your entire WordPress site, files and all, will be safe always. Further, you can check/repair and optimize your database, and if you need more juice, you can go for the pro version.
UpdraftPlus Backup and Restoration Free WordPress Plugin

One of the highest-ranked WordPress backup plugin, UpdraftPlus adds fun and ease to backing up your WordPress site. With a number of sweet features including backups to Amazon S3, Google Drive, FTP, Dropbox, email and other storage options, quick restore, scheduling, site duplicator, capability to split large sites into multiple archives, and so much more, you can’t go wrong with UpdraftPlus (and the developers also offer a pro version that packs quite a punch if you’re looking for more features).
WordPress Backup to Dropbox Free WordPress Plugin
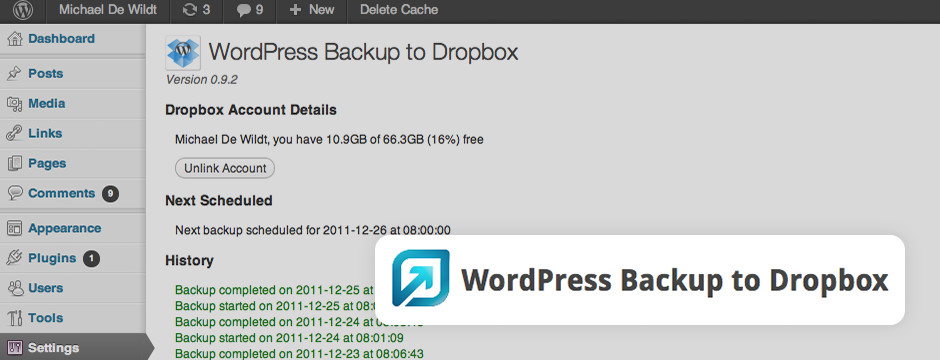
Last up is a WordPress backup plugin that forces you to make use of that Dropbox account that’s been lying around. WordPress Backup to Dropbox makes it simple to send full backups to your Dropbox account. Just install the plugin, set up a schedule and authenticate your Dropbox account. Simple as A, B, C.


